
Add the hair in the usual fashion.
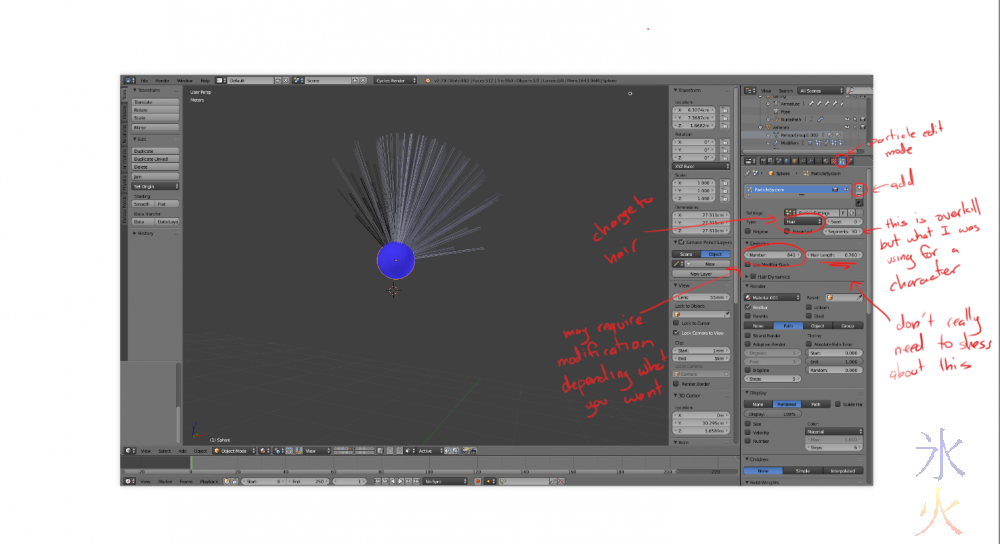
By default the hair will just sprout wherever. To restrict it to a certain part of the mesh, create a vertex group in vertex paint mode, and then use the group you created as a density map (found at the bottom of the particle panel).
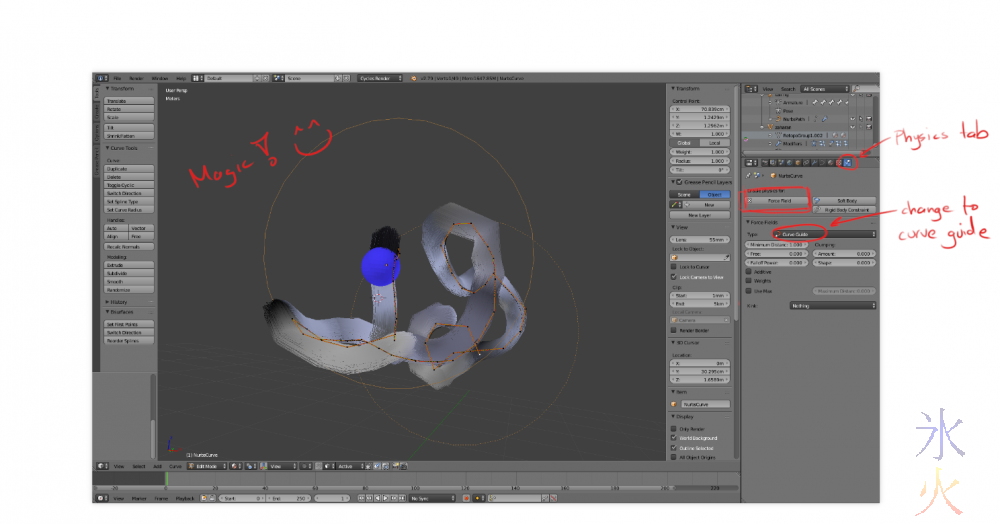
On the SAME LAYER (this is very important, I say because it completely stuffed me for a ridiculously, laughably long time), shift+A and add a curve (I ended up using nurbs as from my extremely quick experimentation it seems to animate the fastest, but any curve will do the job). Adjust the curve to stick one end on the surface of the model, and drag the rest out as long as you need with as many points as you need.
Then activate Force fields on the Physics tab and change the type to Curve Guide.
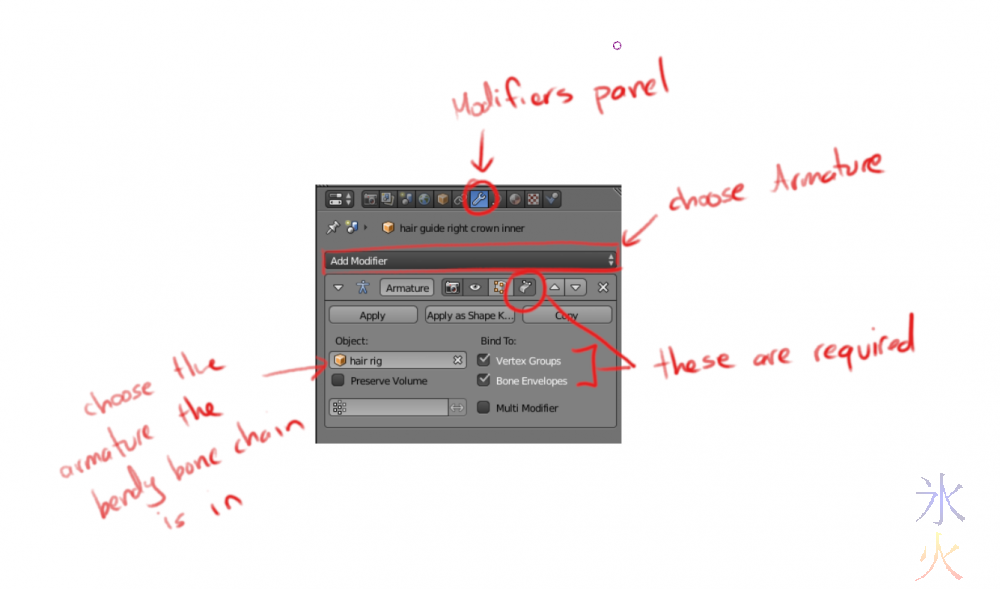
The curves can apparently be animated like soft bodies (whatever that means, I haven't started playing with that yet) and rigged with bones. The method I'm currently using is making a chain of bendy bones and getting all the curves to use it.
With enough setup it does this:
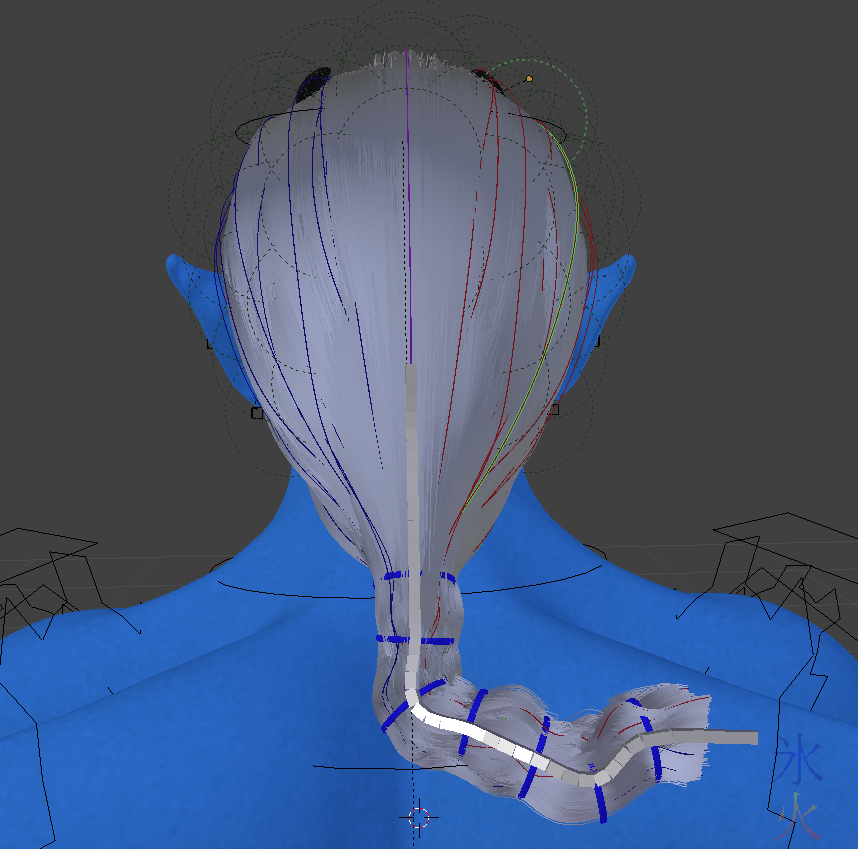
(why yes I used Red because I was too lazy to make a bone chain setup for the ball example after throwing all those points around)
I haven't yet worked out how well it will react to things like wind as I haven't got around to testing it yet. What I do know is if allowed to respond to gravity it falls through the emitter mesh because emitter collision (which works beautifully in combing mode) doesn't count apparently.
And now the bonus. With the kind of texturing I do on my characters, I need to do the hated separate emitter mesh method (ie copy the top of the head where the hair is going to be growing out of and shrink it slightly so it fits inside the head and make that the same colour as you want the hair). If you have more cartoony characters you might be able to get away with setting up a node tree something like this on your skin material:
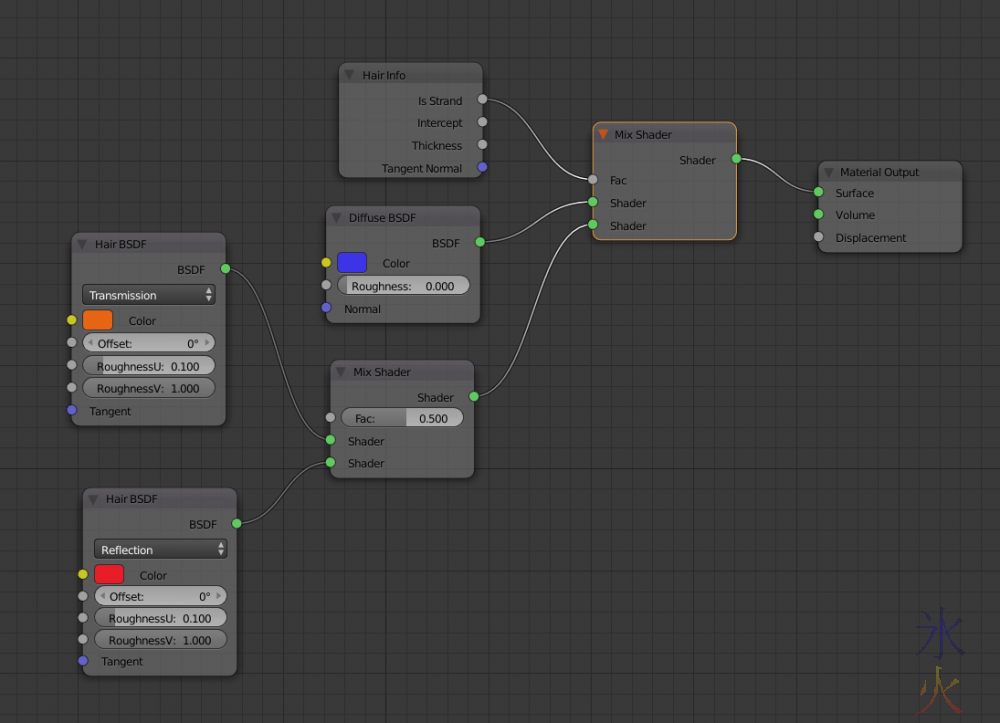
Which gives:
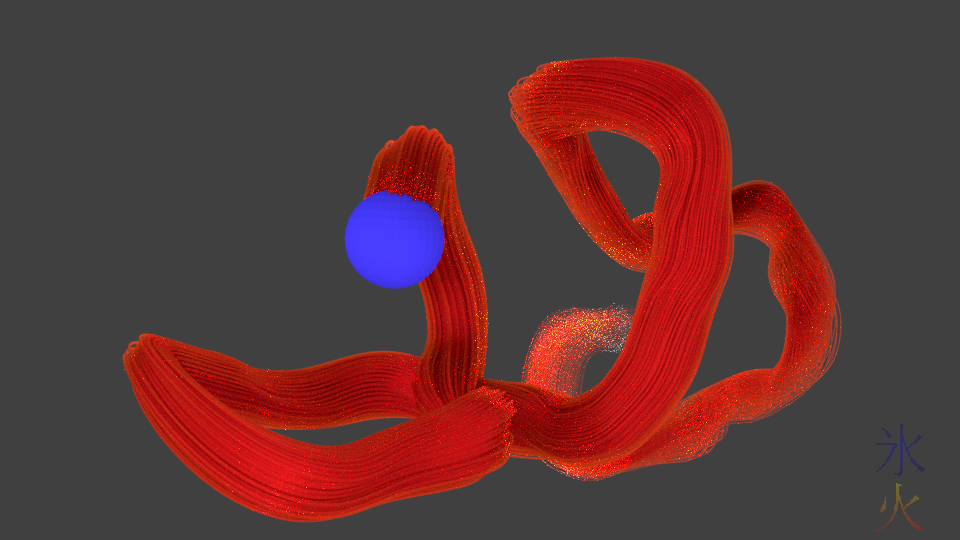
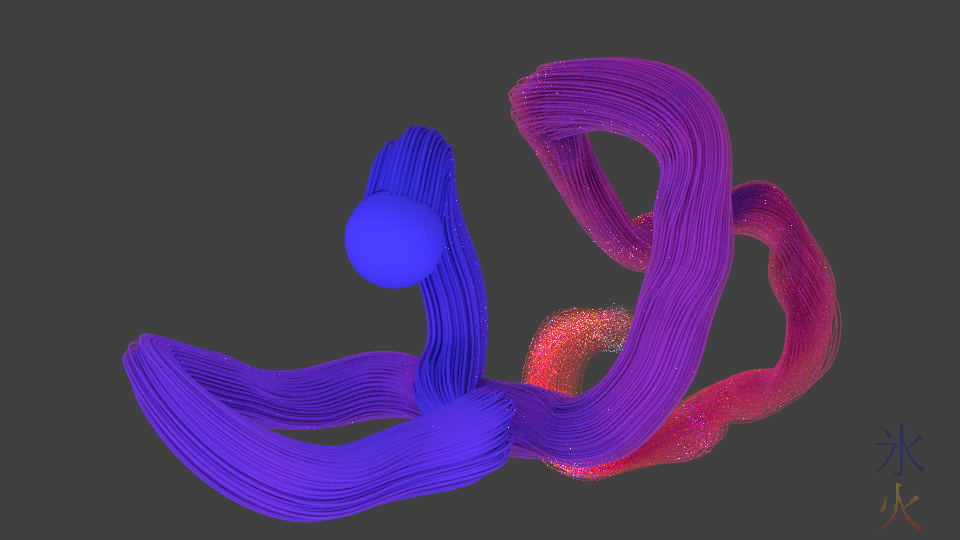
Please excuse the fireflies, my render settings were pretty low so it would spit out quickly. You can get some nice effects throwing in extra nodes, as I accidentally discovered when I was playing around before coming up with the above node tree:
CC-BY

This work by bek (ryivhnn) is licensed under a Creative Commons Attribution 4.0 International License.
No comments yet
- Reply

You're welcome ^_^ And same :D
