

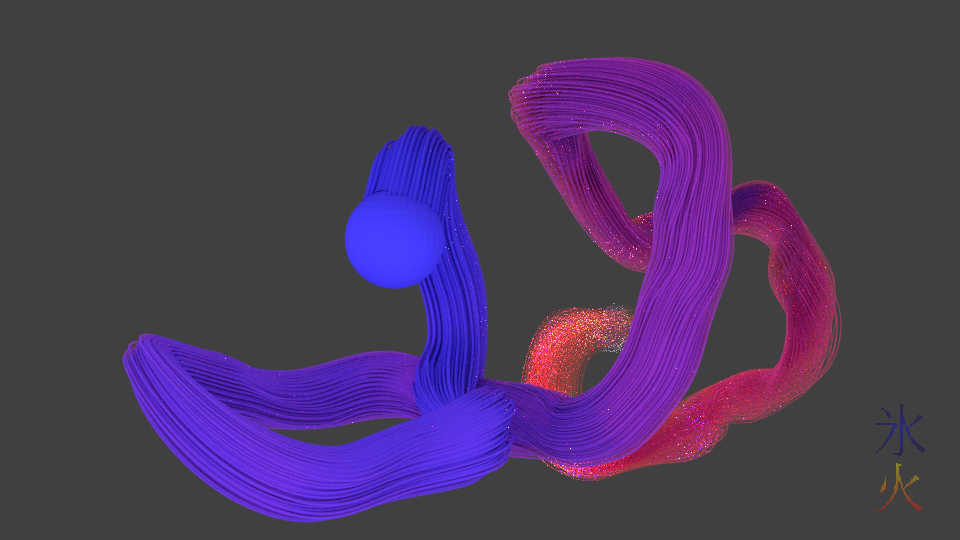
art
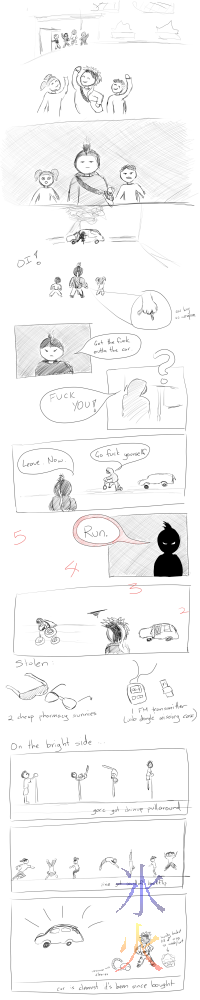
So my car got broken into the other day...
Saturday, 28 July 2018 @ 10:45am
To avoid the incident happening I shouldn’t have stayed for adult gym, but then the kids wouldn’t have gotten the things they got. And I think the only reason we caught him to to begin with was because I was actually in a hurry to leave, usually we all stand around chitchatting for 5-10mins before scattering to the four winds.
FAQ Why didn’t you knock the guy out/beat him up? I had every intention of disabling the guy and then calling the cops. But logic brain kicked in as I was approaching and gave him some warning (“OI!”) and continued grappling with the rest of the brain which was still following through with the original plan when he completely failed to notice I was coming (I wasn’t even being quiet). Eventually logic brain pointed out that because I was that mad, “disabling” could mean “submission pin” or it could mean “is going to end up with a concussion” or it could mean “all the limbs are broken possibly a few times”, and I probably wouldn’t remember at what point that happened, and I don’t have time for the kind of trouble that could get me into.
June ProgBlog #2
Monday, 11 June 2018 @ 8:26pm
I was actually intending to do this on Friday, but I was also setting up some new backup drives (my original drive was appropriated) and needed to copy the old backup from my computer (where it’s currently taking up a HELL of a lot of space!) and I found out the hard way that I can’t use 3d Coat and have big copy operations going at the same time because it makes my computer run out of memory.

May ProgBlog #2
Friday, 25 May 2018 @ 9:05pm
After looking at how erratic my steem and Patreon feeds can be, I guess I really better put in the effort to make these weekly, perhaps showing off the pathetic amount of progress I didn’t make will kick me into working more harder smarter.
So as I said last update I’m going back to what I know (which is keeping the polycount as low as possible) but experimenting in a slightly different direction (I have a probably unhealthy obsession with needing all the quads to be as square as possible so I tend to end up with slightly dense meshes).
Lost in the head-universe
Saturday, 12 May 2018 @ 9:58pm
Shimmer by Fuel came up on my Spotify playlist:
These lyrics stuck out as something I figured JJ probably constantly thinks about me:
She dreams a champagne dream
Strawberry surprise
Pink linen on white paper
Lavender and cream
Fields of butterflies
Reality escapes her
– Fuel: Shimmer
May ProgBlog #1
Friday, 11 May 2018 @ 8:43pm
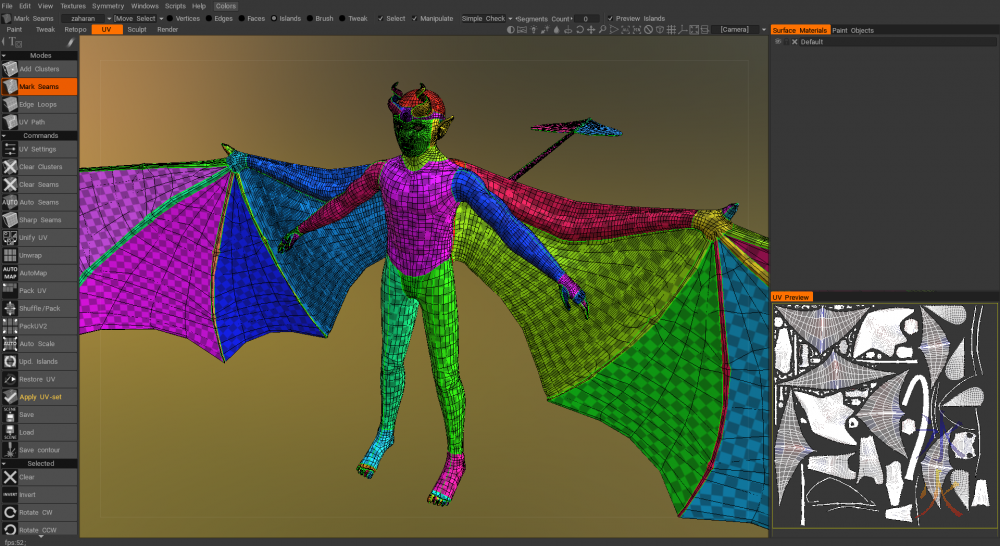
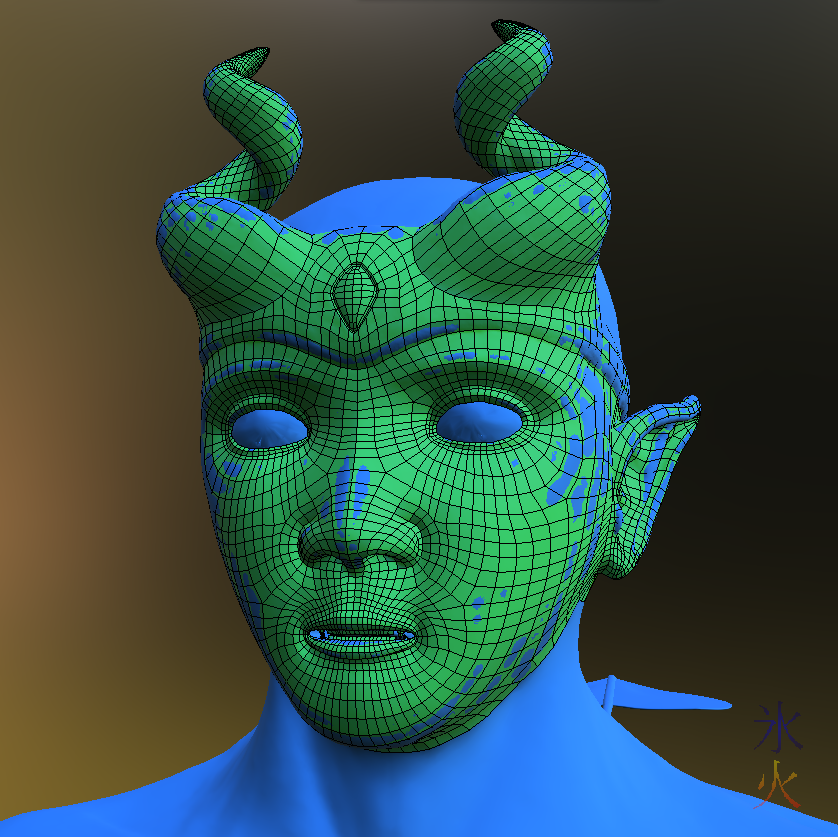
Blender’s viewport is massively outdated and exceedingly laggy. This has made trying to correct the weights on the ~300k poly model of Red agonisingly painful and take way, way longer than it should be. I still have plans to do a proxy for animating with, but that doesn’t remove the need for the actual model to work. Apparently this will be fixed and updated later this year and from the sounds of the people who are braving it in its current bug-infested state, it will be wonderful. I’m not waiting around for it, I’ll just let it catch up to me which is highly likely.

Tubcat
Tuesday, 24 April 2018 @ 10:46pm
TubCat goes around giving unwashed humans a hard time for being not as intelligent as a tubcat, as far as I can tell. It’s generally amusing.
What was less amusing was finally getting a good result on a jpb export (had to fiddle with Krita settings again) only for my blog to do something weird with it on upload, making the colours darker. Seeing as this was
I went with the png which worked out much better at the cost of being four times bigger. Sigh.
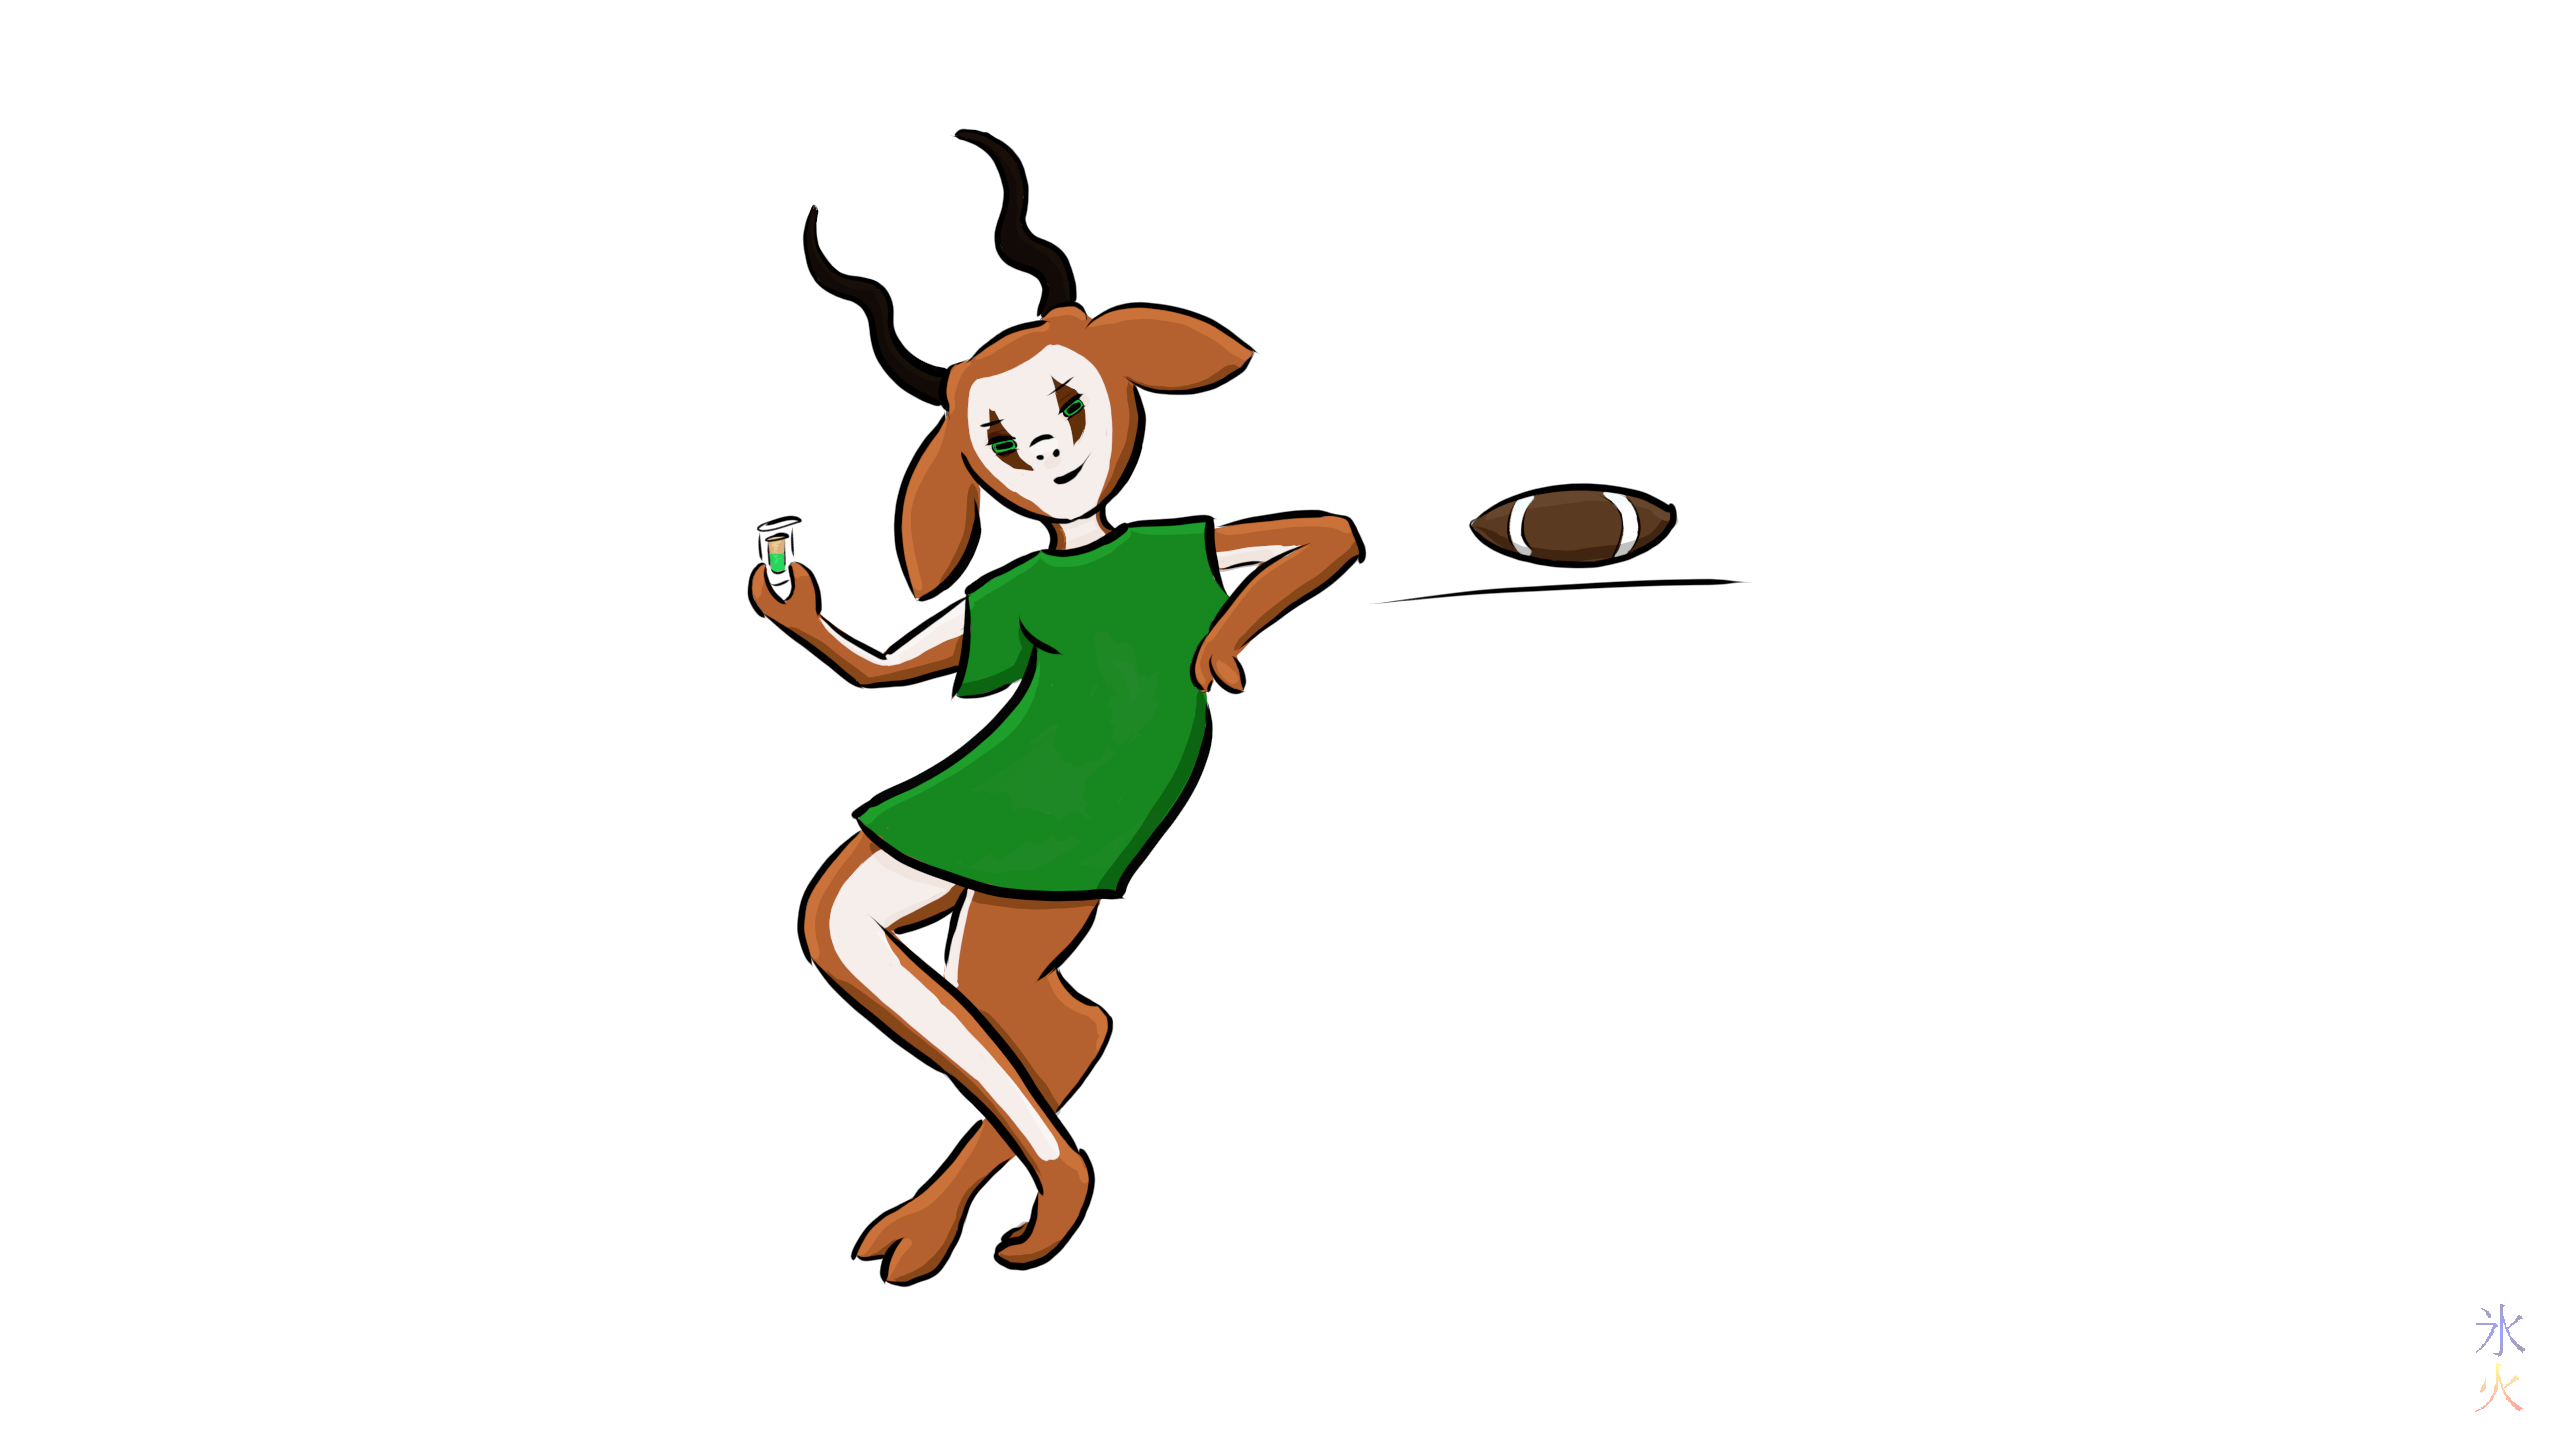
Upbokki
Friday, 20 April 2018 @ 2:48pm
BMJ requested a springbok holding a shot glass and a rugby ball for a mascot for one of the communities he’s in. He got a bonus two because I had some fun ideas. I wasn’t going to do any shading but felt that they needed that something extra. Haven’t done cel shading for a while but it worked out better than expected, partially helped by learning how to handle the new Krita brushes.
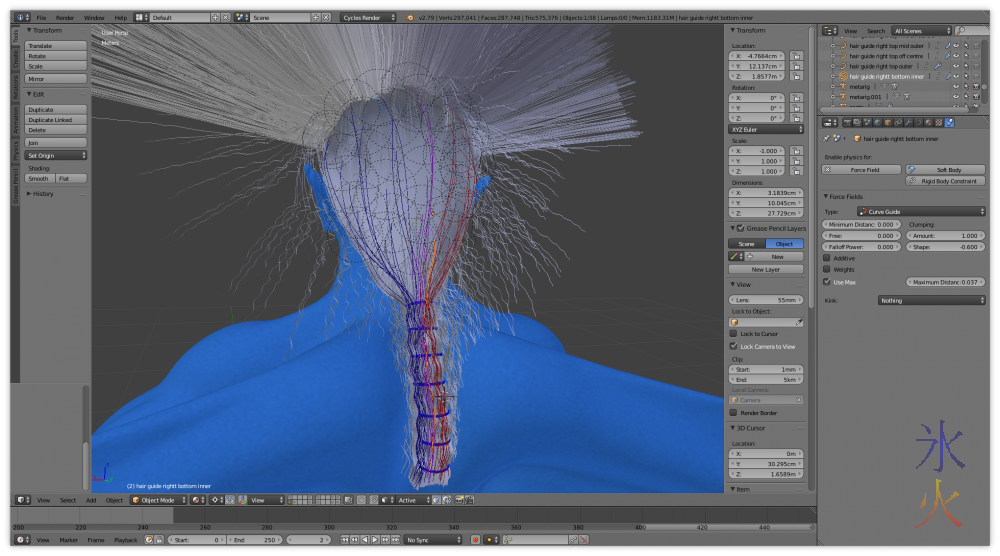
Blender notes: curve guides for particle hair and bonus hair colour without making separate emitter geometry
Wednesday, 18 April 2018 @ 8:13pm
Add the hair in the usual fashion.
By default the hair will just sprout wherever. To restrict it to a certain part of the mesh, create a vertex group in vertex paint mode, and then use the group you created as a density map (found at the bottom of the particle panel).
April ProgBlog #1
Tuesday, 17 April 2018 @ 4:57pm
I still haven’t worked out whether it’s better to keep a regular update even if it’s “I’m an idiot and got stuck again” or just not say anything if I’m that stuck.
So after combing the hair into the right shape, I found out a few things.
while the collision detection works really nicely in particle edit mode, it completely fails when actual physics is applied, because for whatever reason the emitter collision is completely ignored I can’t work out for the life of me how the hell to rig particle hair I’ve done spline IK for the tail rig so was trying to do something similar with the hair but don’t understand how particle weights work. Wasn’t the biggest leap to find out about curve guides, and then took me the better part of forever to work out that curve guides had to be on the same layer as the particle emitter to work. Once that was sorted out, I then spent way too long playing around with the different curve types to work out which one would be the best for the job. Seems that nurbs animates quickest so that’s what I’m using.
March ProgBlog #3
Saturday, 24 March 2018 @ 7:07pm
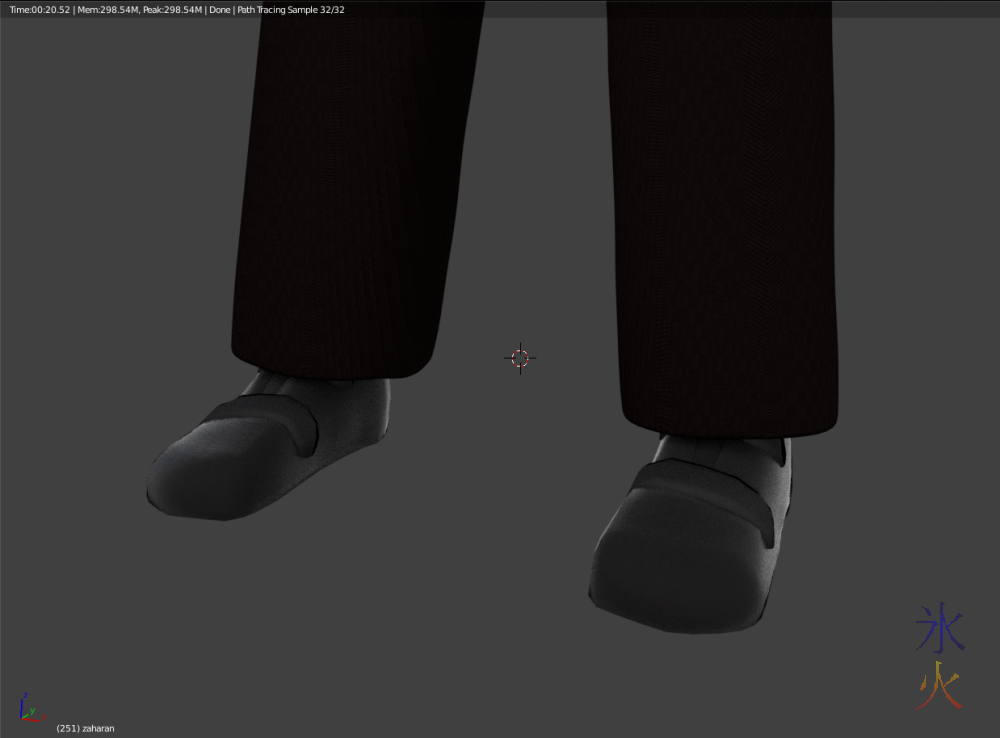
Last week was working on pants and boots (and getting to use some fabric normals and a leather material some kind souls made available on Blendswap):
trying to wrangle the hair into several hair ties (it was supposed to be tied with a cord but I finally got it through my thick skull that it wouldn’t stay, even when I did have long hair I didn’t do anything interesting with it, so I’m going to claim total stupidity ignorance and too much anime on my part there!):