May ProgBlog #3: Blender 2.8 notes - cloth sim
posted on: Saturday, 23 May 2020 @ 11:21pm inProgblog is actually late because I decided to combine it with a Blender notes and it took the better part of forever x_x
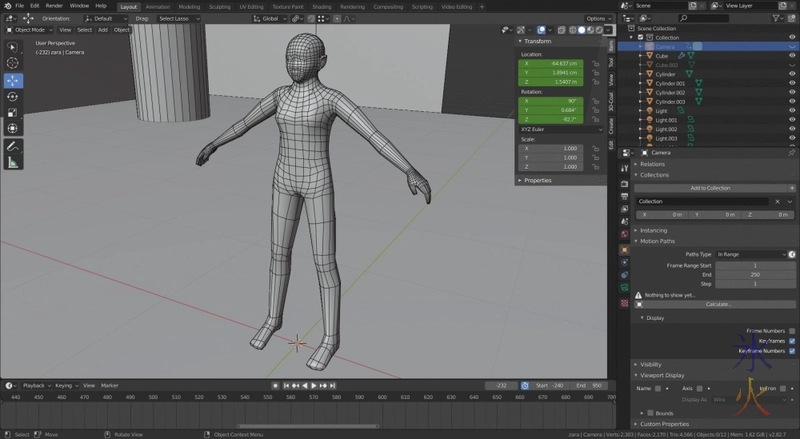
Make a collider. Some people do it by decimating a copy of the character. I made one by my old Blender retopo method of edge modelling with mirror and shrinkwrap modifiers (which took way, way, way longer than it should have because I kept stopping, procrastinating and whining all the way through it, much like my children with the much hated bookwork) and remembered why I bought 3d Coat. I did that rather than decimating so the collider would have no facial features aside from hints of eye sockets and a nose bump, and no digits, so it could be super low poly and the right shape (this one is not really super low as the head and hands are a bit dense).
The numbers aren’t settings to use as a rule, just whatever I was playing with at the time I took the screenshot. For normal/general situations a step quality of 5-10 and subdivision level of 1 should suffice. If there’s combat or other rapid movement, they’ll need to be bumped. This may involve a lot of experimentation.
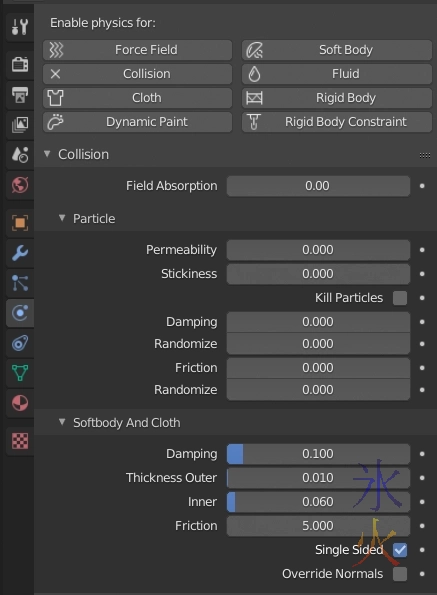
Collision settings need to be set on the collider for hair and cloth to…collide with it and theoretically not clip through. Thickness outer needs to be as small as possible, thickness inner needs some fiddling til the cloth bounces out somewhat reliably if it clips through.
Put the cloth sim after subdivision and before solidy in the modifier stack.
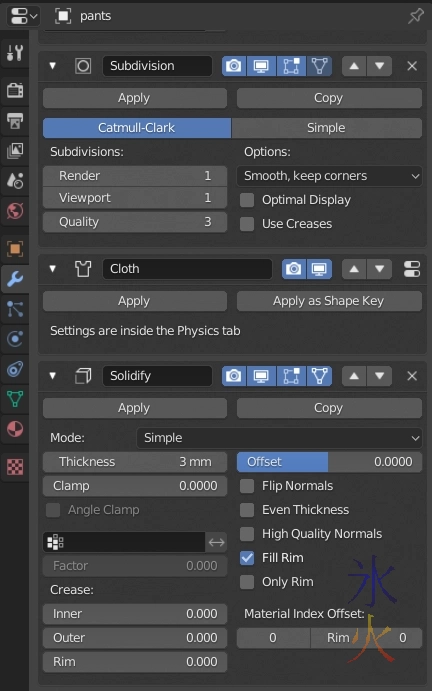
The order executes from the top down (yes I know it’s blatantly freaking obvious when you know what you’re doing but I do recall a time back when I was still new to Blender a hundred million years ago where I didn’t know how the stack worked and thought it was just a list of things on the model). So what’s going on in the pants stack at the moment is:
- deform the lower poly model (you can’t see the armature modifier above the subdivide modifier because I have all the modifier panels expanded and the panel they’re in isn’t that long)
- subdivide the model after it’s been deformed by the armature (less points to calculate for the armature so makes animation slightly quicker, and the subd modifier itself is used to make things look smoother and look like it’s high poly without having to add actual geometry - note this only works in some cases and sometimes you just need more geometry)
- do cloth simulation on the subdivided mesh
- solidify the subdivided cloth simulated mesh
Pin groups are required for waistbands and other bits that aren’t meant to move much (otherwise the clothes merrily fly off and do their own thing). Use clamping if the vertices keep spiking randomly. Also add the collection your collider is in to the “collision collection” panel.
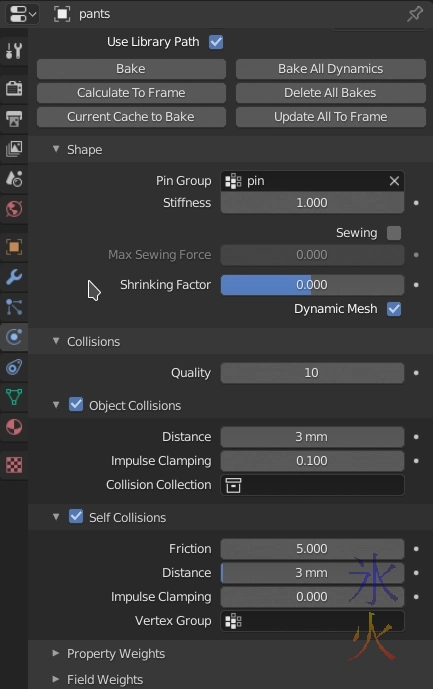
The distance is how far apart the meshes should be before it starts to calculate for collisions. I usually set it to about the same thickness as the solidify modifier, and given that my collider shell is already about 3mm off the render mesh that should help prevent most clips with the render mesh.
Things seem to work better if only the pin group has armature weight maps and the rest is driven by cloth. The vertices in the pin group doesn’t have to be 100%, they can be less so they’re partially driven by the armature with some cloth effects which I eventually did (waist is pinned with weight of 1 ie completely pinned and ankles are pinned at 0.75 so they’re mostly armature driven but react to cloth physics which stopped a bunching issue and helped keep the pants on).
Start in the negative frames in the default pose (which is a modified arrow in my case), then click the little stopwatch thing next to the frame range to switch to preview range (the timeline/dopesheet thing will change colour) and you will then be able to set a negative start time.

Give it at least two seconds (one for the cloth to fall while in the rest pose, and one for the rest pose to move to the start pose with the cloth following).
And don’t forget to change this bit in the physics tab:
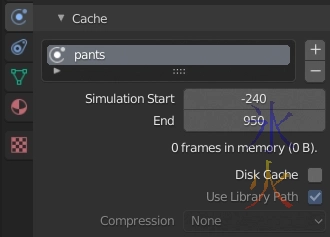
otherwise it will only do it from 0-250 (the default).
Run the animation to build the cache. If the cloth starts misbehaving too badly (don’t stress about minor clips, they can be fixed later, we’re talking the clothes have managed to clip all the way through the collision mesh and are in the process of flying off) then stop it and tweak settings and try again. Blender’s cloth sim seems to really, really struggle with pointy bits especially if they’re moving at high speed (so pretty much knees when your character is doing tuck jumps and jumping kicks, imagine the same thing would happen to elbows but I haven’t done a long sleeved top yet). For this particular character I’ve been bumping quality steps by 5 til the pants legs are clipping through the leg but recovering back onto the leg rather than clipping through and flying off before upping subd level, rinse repeat.
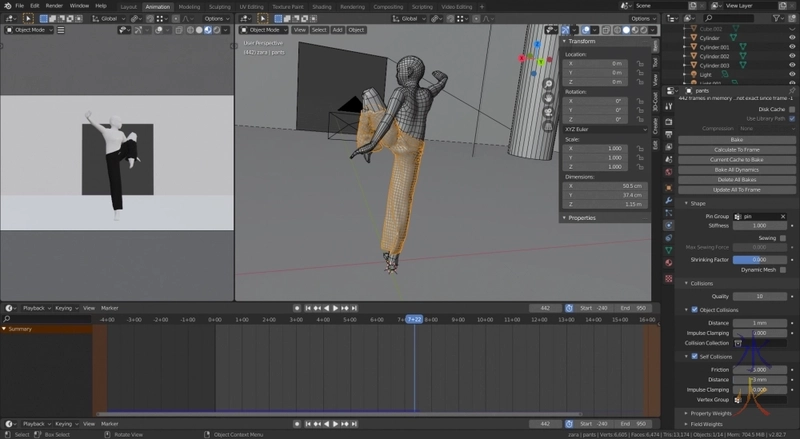
Lower subd levels are a LOT quicker but also seem to stretch the polygons at times which subsequently causes exploisions (clamping might help), higher subd levels bog things right down but you get really pretty folds and a lot more stability.
This process might take forever.
I eventually managed to fix the above problem but if subd level 3 doesn’t fix this (current settings are subd2 and 30 quality steps) I don’t know what will.
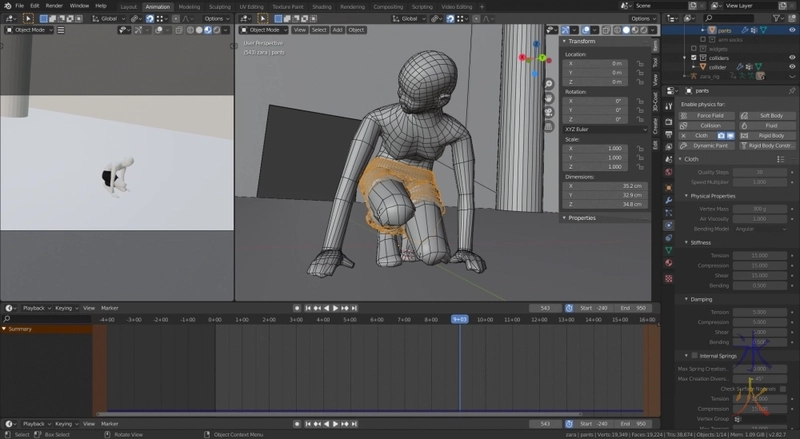
When you have something perfect (well done!) or near enough and just needs some minor repairs (more likely) you can hit the bake button which should then save that cache into the blend file so you don’t have to do it again. There is a delete bake button if you need to change something.
Theoretically you’re supposed to be able to edit the bakes afterwards and then rerun the simulation from your fix and then bake the fixes, but I still haven’t figured out how to do that.

