Blender notes: extremely basic hair
posted on: Monday, 8 June 2015 @ 2:16pm inWhen I did the head hair I did a scalp (copy of the…uh…scalp on the top of the head where the hair is growing out of shrunk down to fit just inside the head) with its own material to colour the hair strands because it was the easiest thing to do as the hair strands pick up whatever texture is applied to the geometry. Wasn’t too crazy about the extra geometry but couldn’t work out how everyone else on the planet had done it so crashed around the particle system and node tree til I got something going.
Add the hair in the usual fashion:
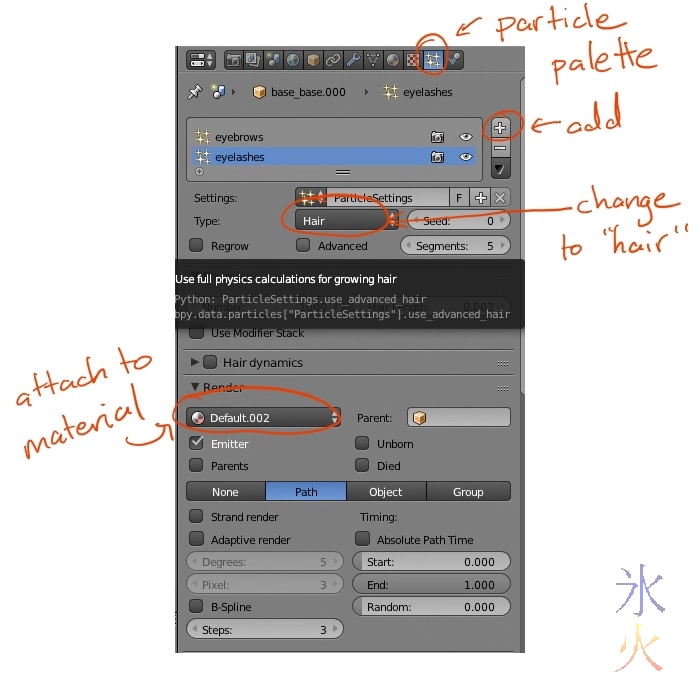
I found the default of 1000 strands good enough for the eyebrows, and had 1 interpolated child per strand. The size (which is hidden under that tootip that I only just noticed and can’t be bothered making a new screenie now) should probably be adjusted to the longest length you want as while you can edit the length in particle edit mode, if you add any more hair strands they will be the max length. For eyelashes and eyebrows set the Cycles Hair Rendering to “Ribbons” from “Thick”. For head hair see how the render looks.
Make a vertex group or three in the usual manner:
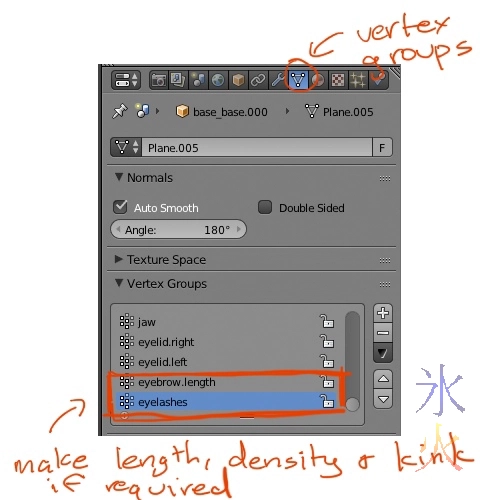
Go back to the sparkly particle panel and set the strand length and density (and any other maps you need):
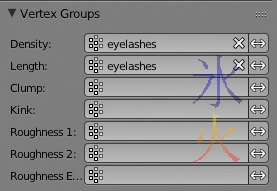
While you’re there drop your strands down to 1-2 interpolated child strands and set the root thickness to 0.02 or 0.03. Now pop back to the vertex group palette to make sure you have the right group selected, then switch into weight paint mode, start painting and watch the hair strands appear where you paint.
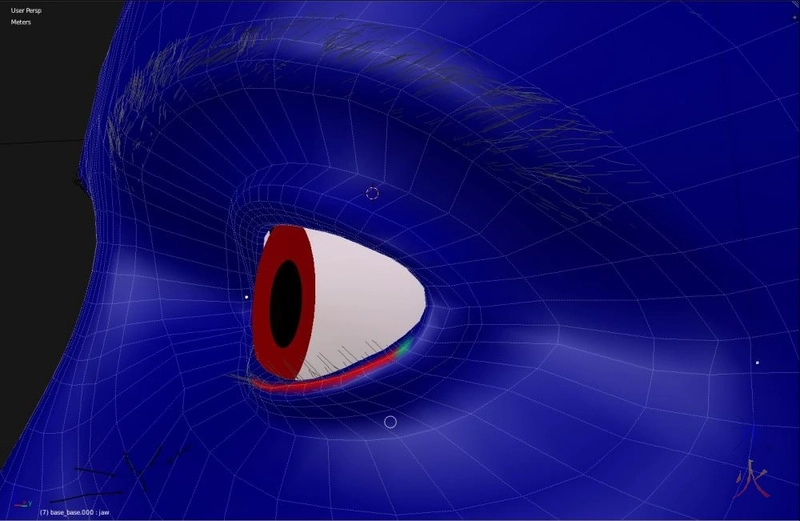
Drop into particle mode and have fun playing hairdresser.
Go to vertex colour mode and paint the areas the hair is going to appear the colours you want them to appear.
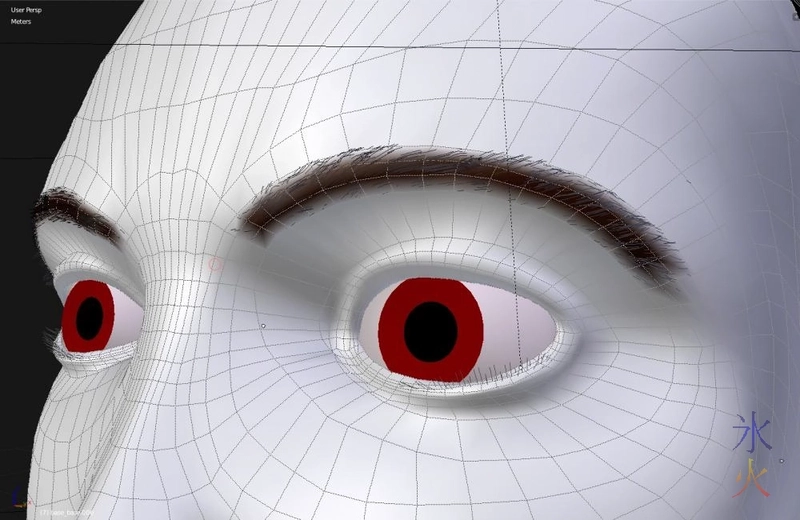
When texturing and wanting hair that’s not the same colour a the skin shader texture colour make a node tree something like this:
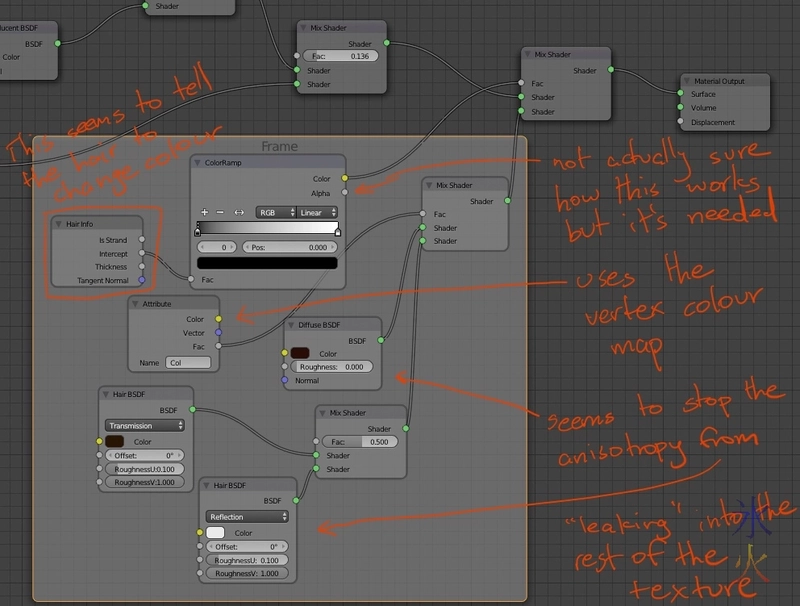
You can plug the colour things from the Attribute node to the Diffuse and Transmission Hair nodes to get the colour from the map, I didn’t in this case as some white hairs cropped up in such a way that it looked like there was lint stuck in the eyebrows. For some reason this was still present but a lot less obvious when setting the colours directly on the nodes.
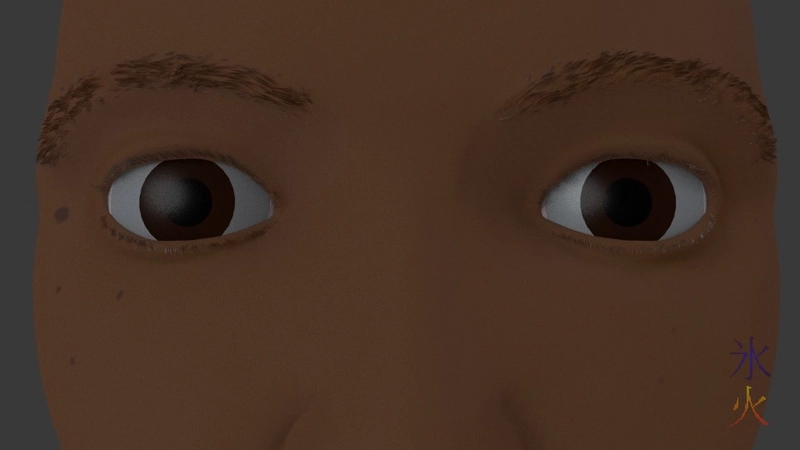
Good enough for my purposes. I don’t think I will ever do an ECU of my face at any time other than checking eyebrow and eyelash renders and I also need to find out why Blender seems to be outputting jpgs so dark. Also need to see how everything (shaders and hair) cope under different lighting conditions as everything is pretty studio at the moment.

