Blender Adventures Part 2
posted on: Sunday, 1 December 2013 @ 12:31pm inI finally got basic modelling in Blender.
All I needed was to find where the subdivision tool was hidden.
Early days Blender and Lightwave comparison:
Layout
I prefer having a menu on my right as I use a Cintiq and find it quicker to access stuff I don’t know keyboard shortcuts for (or that don’t have keyboard shortcuts) if the menu is over to the right. I can move it in preferences in Lightwave.
In Blender I haven’t figured out how to get rid of the panels without switching into full 3d view (which gets rid of more panels than I want to get rid of and I can’t move the one I want to move). This is not too big a deal as I can resize the panels to don’t really notice them on the Cintiq, and being able to have more Blender windows to litter across my screens is great (okay so I only have one with three views on the big screen but it’s cool that I could split out that one into more views because it’s a big screen and I also have one more screen I could put another window on, or have several small windows or…)
Zoom
Blender uses the touchstrips by default, but I am not sure what I’m doing to affect its scale. Sometimes it will zoom as much as I want I want it to. Sometimes it makes these spectacular leaps and I can’t get the distance I need to. Fortunately I accidentally discovered the key combo which I use in a pinch, but will have to change my button configuration for Blender to use it regularly comfortably. Lightwave only uses the key combo which I have set up comfortably for. Doesn’t acknowledge touch strips.
Subdivision modelling
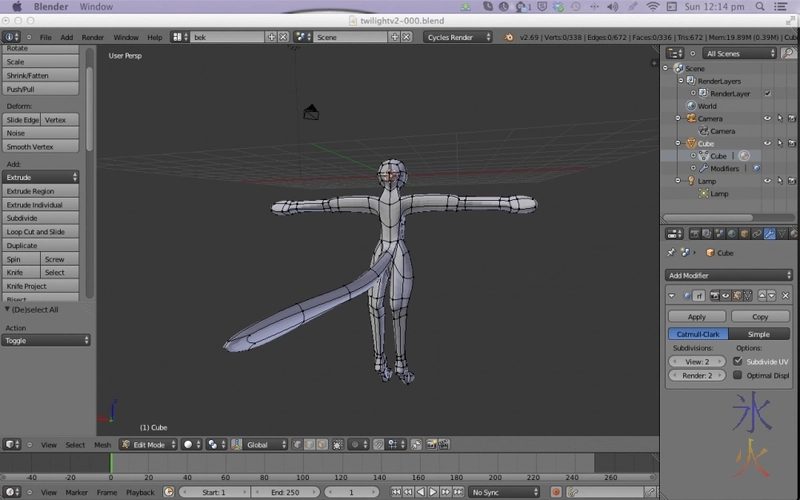
In Lightwave, you make a cube and press TAB. Done. In Blender, you click on an icon in the second panel in the right sidebar that looks like a spanner, drop down “Add Modifier”, see ALL of the potentially fun and useful things in there, find “Subdivision surface” and select it, then play with the settings. Blender and Lightwave use different subdivision thingies. A subdivision level of 2 in Lightwave means each patch is divided into 2 on each edge (so you end up with 4 polys per patch). In Blender it’s 4 (I have 16 polys per patch), so the subD level of 2 has been fine where I would normally use 3 (not that I care too much as it only mattered when I froze anyway and I’ve been diving into Sculptris for detailing lately).
I’m having moments of frustrating myself because I inadvertantly try to do something a Lightwave way which doesn’t work in Blender, and getting frustrated because I’m not used to Blender or don’t like the way it does something.
Selecting
In Lightwave, right click and drag. In Blender, oh yeah right click moves the 3d cursor (or at least it does in my set up, because it was quicker at the time to tick the box in Blender prefs to make right click setting the 3d cursor than to open up Sys Prefs and change the tip touch on my pen to right click, otherwise not like one option is harder than the other). Theoretically you’re supposed to be able to hold down ctrl and drag, but that hasn’t happened for me and I didn’t change the key bindings. Currently a minor annoyance rather than a major issue as selecting loops in Blender was easy once I worked out it goes the same direction as a flick.
What was kind of cool was how Blender seemed to grab the nearest point if I missed the one I was aiming for and clicked in space , though it was occasionally annoying when there was a collection of points close together and I didn’t get the one I was after.
Symmetry
Easy as a button press in both. Left and right flip when working on the left side of the model in Lightwave and both points are highlighted so you know they’re symmetrical. Blender you can move any point in any direction and the corresponding one won’t highlight but will move in the opposite direction. I had a minor drama where I couldn’t work out how to resymmetrise some points in Blender that had somehow gone out of symmetry and ended up having to dissolve the edge and loop cut and slide again (the topography mirror in Blender makes me really happy). As far as I can tell Lightwave doesn’t resymmetrise natively either, I have a plugin for that. Other thing I can’t seem to work out in Blender is how to set the value of points. In Lightwave if I need some errant points back on x=0 I can hit v and set it. Haven’t worked out where that option is in Blender yet.
Spline modelling and rail extruding
In Lightwave I draw a spline and background it and extrude a polygon along it with the Rail Extrude button (from memory there’s a dialogue to configure but that’s pretty much it). In Blender I haven’t figured out how to do that yet, and the internet apparently has no idea what I’m banging on about, which is not unusual. It meant I got stuck dopily extruding Twilight’s tail. Extruding in general was rather interesting as I haven’t worked out how Blender decides to do the extrusion direction (suspect it has something to do with the angle I’m using to view the model). I like that Blender combines extrude (of individual faces) and smooth shift (of the selected region) into one tool.
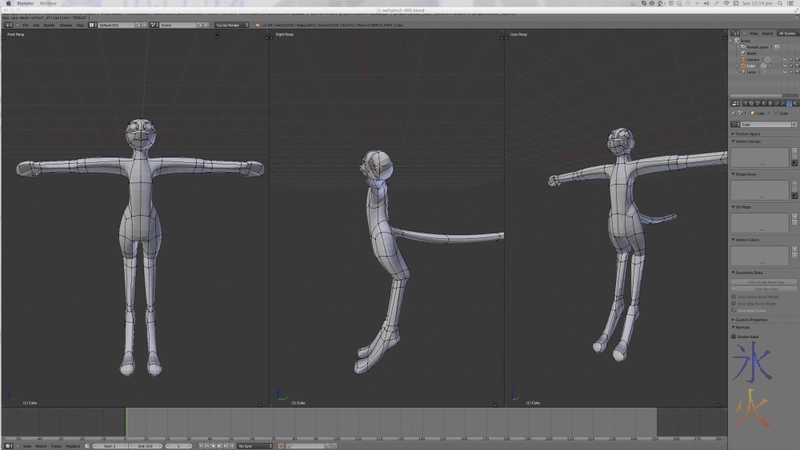
Using my leet modelling knowledge gained from Lightwave over the years I very quickly roughed out Twilight and decided I was going to do the ears and refine the eyes in sculpt mode as well as adding the detail.

2560x1440 main screen where I can keep an eye on how things are looking from various other angles and occasionally pop up here to move a point

1280x800 Cintiq where I do most of the work
This work by ryivhnn is licensed under a Creative Commons Attribution-NonCommercial-NoDerivatives 4.0 International License

